
Managing Users in Your BandHelper Account
TL;DR
If you're an account administrator, you can log into the website and go to Admin > Users to add your bandmates to your account and set their notification preferences and permissions.
Everyone in your band can log into your BandHelper account to view or help manage your data. Here's how to set them up:
- Log into the BandHelper website and click Admin > Users in the main menu. You'll see a list of usernames including your own.
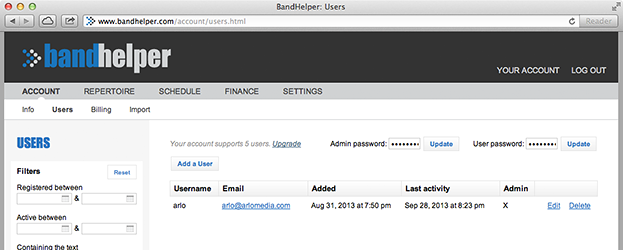
- Click the Add a User button, and an empty page for a new user will appear.

- Enter a username for the new user. Usernames shouldn't include spaces or punctuation. They will display uppercase characters, but are not case-sensitive when logging in (so someone with the username Bernard can log in as bernard).
- You can either set a specific password for the user, or click the Random button to generate a random password.
- If you select the Send Login Info checkbox, BandHelper will send a standard email message to this user containing their login information, links to download the app and links to introductory tutorials. If you don't use this option, you'll have to give the user his or her login info.
- Enter the user's email address, plus a mobile phone number and the country where the phone number originates, if you want this user to receive SMS notifications.
- Select the user's time zone if it's different from your own.
- Select at least one notification style; these are used when sending event updates and reminders and set list updates.
- Enter a display name and, optionally, a role for the user. These appear in user selection lists throughout BandHelper.
- You can optionally upload a photo for the user. Currently, the photos are only used on stage plots.
- If your account contains more than one project, you can select the projects you want this user to access.
- Make sure the Active checkbox is also selected, or this user won't be able to log in.
- Decide whether or not this user will be an administrator. Administrators can manage other users as you're doing now; they will also receive additional website notifications, like renewal reminders. Generally, the leader or leaders of a band should be administrators and the rest of the band members should not. Click the Administrator checkbox to make this user an administrator.
- Decide how much editing access to give this user. None means the user is read-only and can view but not edit any data. Added Data means the user can add data like songs and set lists but can only edit the data he or she added. Added Data users can also edit their own personal fields and custom fields for items, and attach their own documents and recordings to items. All Data means the user can add, edit or delete any data, except admin data like users, projects and billing info.
- Decide how much viewing access to give this user. Personal Finance Only means the user will only see their share of event fees and payments and will not see how much other band members are receiving. Personal Schedule Only means the user will only see events they are included in. Event Contacts Only means the user will only see the contact info for events they are included in and will not be able to browse the full Contacts list. Generally, these settings are meant for subs or part-time members, but you can leave them unselected to give full transparency to full-time band members.
- Decide how detailed an app user interface to show this user. Setting the Interface Level to Simplified will make the following changes:
- In the app module menus, items used primarily for setting up data will be enclosed under a "More" button. For example, in the Schedule menu, you would have to click the More button to see the Categories, Custom Fields and Documents buttons.
- On some app edit pages, less-used fields will be hidden completely. For example, on the song edit page, the Starting Pitch and Tempo Subdivisions fields will be hidden.
- In the set list view, only layouts that are set as favorites or were added by the current user will appear under the Switch Layouts button.
- In the set list view, the Edit button will only show the layout editing options for layouts that were added by the current user.
- Click Save to save this user.
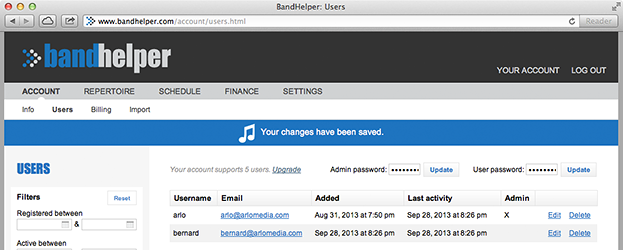
- When users log into the website, they can go to the Admin > User page to see a limited version of this page. They can use it to change their password, contact info and notification style, but not their account, editing or viewing access.
Here are some additional notes about user management:
- You can continue adding users up to the limit determined by your subscription price. If you need to expand your account to add more users, you can click Admin > Billing in the main menu and select a new account level. This will change your expiration date depending on how much value is left in your current subscription, and the next time you renew your subscription, you will pay the cost of the new account level.
- If someone leaves your band, you generally can't delete them from your account because they are linked to past data like shows and financial transactions. However, you can deactivate them to keep them from logging in and hide them from most areas of your account. Inactive users don't count toward your total, so if you replace someone with a new band member, you can deactivate the old user first and add the new user without needing an account upgrade. To deactivate a user, go to the user's Edit page, deselect the Active checkbox and click Save.
- If you are playing with someone temporarily, and you have room for more users in your account, you can set up a username for that person and allow them to sync to your account. You can set that user to Read Only if they don't need to change any data. When you're finished playing with that person, you can deactivate their username to make room for another user.
- Deactivated users cannot log into the web interface. They can continue using the app, and any downloaded data will remain in the app, but they will not be able to edit the data and will not receive any new data.
Tutorials