
Using song layouts
TL;DR
From the set list view, you can click the Layouts button in the top toolbar to select a different layout, click the Edit button to customize the current layout or go to Repertoire > Layouts to create a new layout.
BandHelper uses customizable screen layouts when viewing songs in a set list or smart list. You can use the standard layout that is installed with the app, or customize the layout to display exactly the info you need during your performances. You can even set up multiple layouts and switch between them for different situations, like practicing versus performing. You can add and edit layouts in the app or the website, but you can only use layouts in the app. You can watch a tutorial video, or read on for more details.
- For new accounts, BandHelper adds an initial layout based on the More Buttons layout template. You can customize that layout or add more layouts later.
- The first time you select a set list or smart list, BandHelper will show a menu of options, including a View button if you only have one available layout, or a separate button for each available layout if you or a bandmate has added more. In that case, you can click the name of a layout to view the set list or smart list.
- While viewing a set list or smart list, you can switch to another layout if more than one is available, by clicking the Layouts button in the top toolbar.
If your current layout doesn't include the Layouts button in the top toolbar, you can switch to another layout by going to Repertoire > Layouts > [layout name] > Edit Details and clicking Set As Default. - Many users pick one favorite layout and use it all the time. Some users set up different layouts for different situations, like practicing versus performing. It's more rare, but possible, to quickly switch between different layouts while performing: you can set up the Next Layout and Previous Layout app control actions. Then you can cycle through your layouts by clicking a foot switch button or swiping on the screen.
- Each layout has a Layering setting that allows either the song list or the document viewer (or both, on phones) to appear on a top layer. This lets you maximize your screen space by showing the song list only when choosing a song, or showing the document viewer only when playing a song. You can double-click anywhere in the layout to hide and show the top layer. Layouts with the Layering set to Split View do not use a top layer and will show all elements all the time.
- Each layout can only be used in one orientation or the other (portrait or landscape). You can rotate your device to see the layouts available for the other orientation. You might see the same layout names listed, but those are separate versions sized for each orientation.
- You can rename, copy or delete layouts from the Repertoire > Layouts list. However, remember that layouts can be shared by multiple users. If there is a layout you no longer want to see, you should edit it and remove yourself from the Users list, rather than deleting it, if other users are listed there.
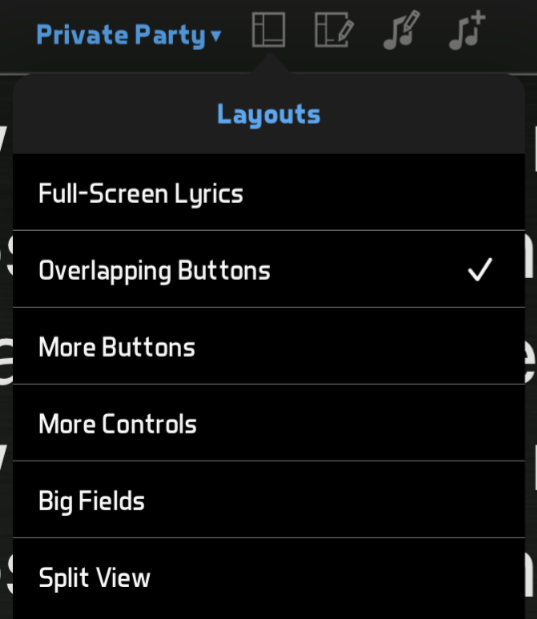
When you add a new layout, BandHelper offers a set of templates that provide a range of options for different performance styles and situations. You can select one of the following templates and then edit your layout further if needed.
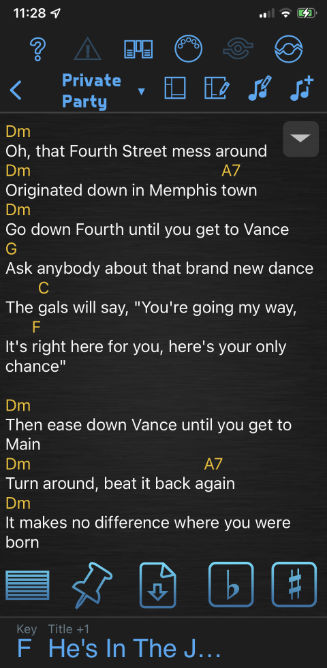
- Full-Screen Lyrics: This layout initially shows a large song list with buttons to access common functions for each song. You can click a document button to show the document viewer full-screen on a top layer, and you can double-click to hide it again. This is best if you want the largest possible lyrics, with minimal access to other functions.
- Overlapping Buttons: If you like viewing full-screen documents but want to have access to some other functions, you can use this layout. It consists of a document viewer that fills the width of the screen, but the top toolbar is still visible and a couple buttons are placed on top of the document. You can double-click to show the song list on a top layer, and you can double-click or select a song to hide it again. This is best if you still want large lyrics, but need access to a couple functions. (You can also access many functions using app actions instead of visible buttons.)
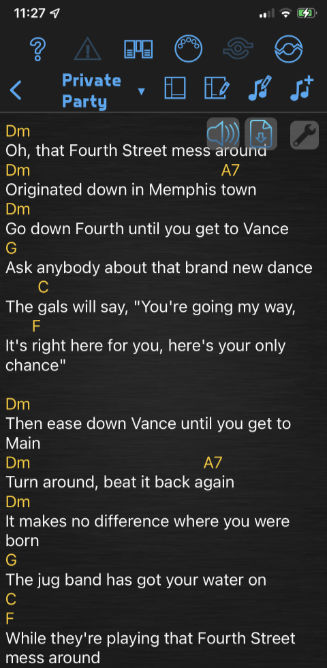
- More Buttons: This layout is similar to Overlapping Buttons, but the document viewer is a little smaller, making room for more buttons. You can show and hide the song list the same way. This is best if you want to trade a bit of lyrics space for more button space.
- Expanded Buttons: If you want access to even more functions, including quick access to multiple MIDI presets, multiple recordings and song notes, you can use this layout. You can click a document button to show the document viewer over the middle area of the layout, leaving the recording controls and song list accessible, and you can double-click to hide it again. This is best for rehearsing when lyrics size is less important than access to alternate versions and practice tools.
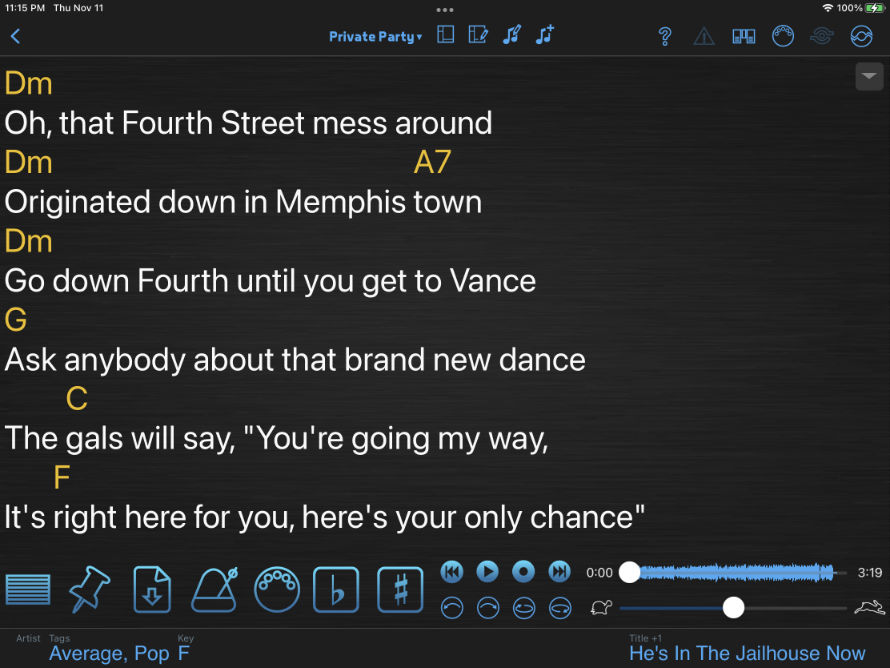
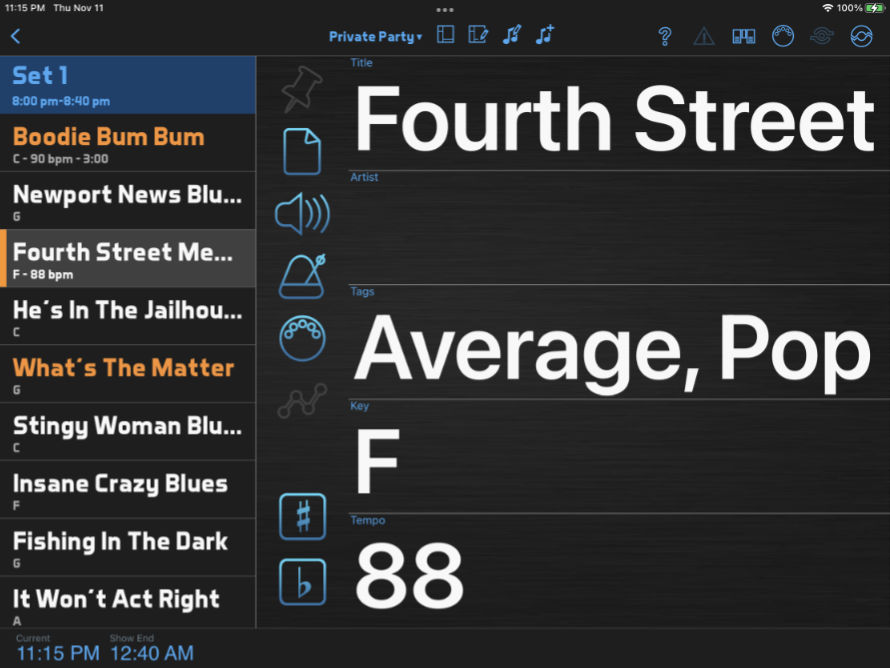
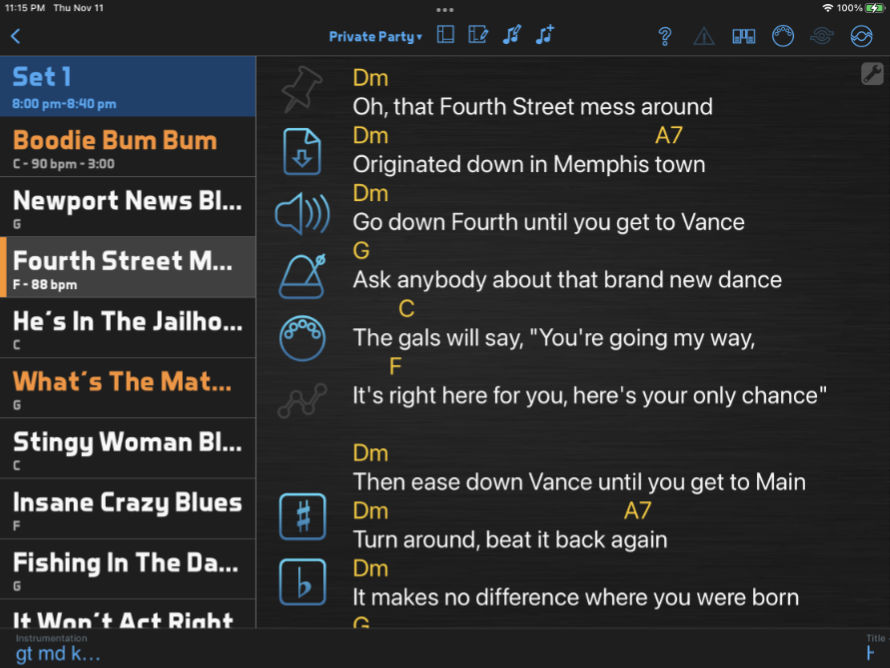
- Big Fields: This layout includes a persistent song list and a set of buttons, as well as several large fields showing song info that you can easily read on stage. After you've selected a song and reviewed the info, you can click the document button to show the document viewer full-screen on a top layer, and you can double-click to hide it again. This is best if you want to access various info about songs during a performance, not just lyrics.

- Split View: This layout shares the space between a song list, song buttons and the document viewer. This is best if you want to simultaneously view your song list and your lyrics.
The layout templates work as-is for many people, but you can customize them to further optimize your workflow. If you find yourself wishing you had a layout that combined elements of different layouts, customization can make that possible.
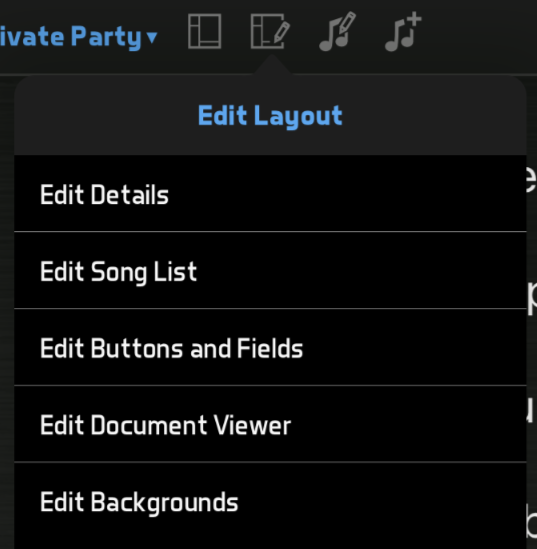
- In the set list view, you can customize your current layout by clicking the Edit button in the top toolbar. You can then choose to edit the layout's Song List, Buttons and Fields, Document Viewer or Backgrounds.
- You can click an empty area of the layout to add a new item, drag existing items to move them or click the X buttons for existing items to remove them.
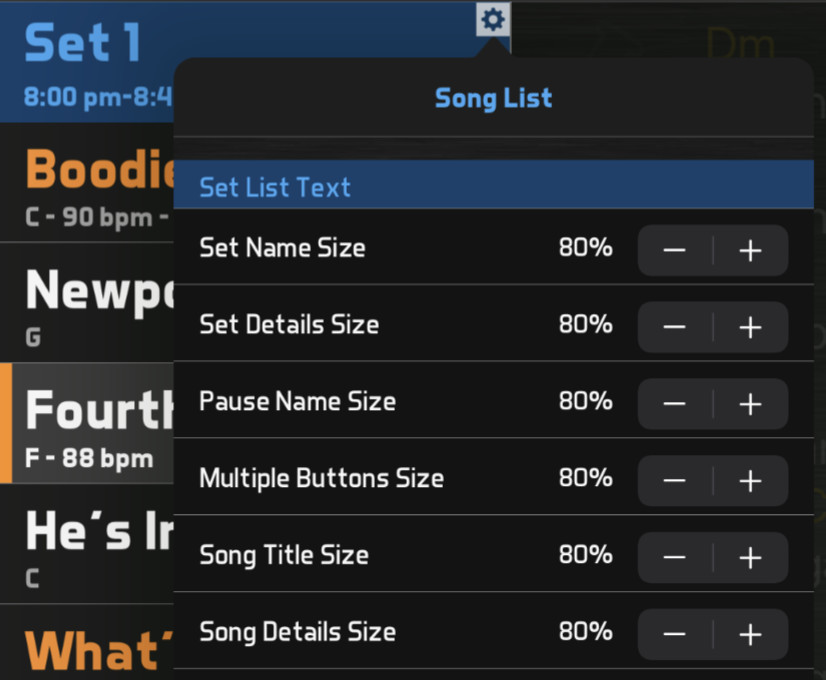
- Some layout items have an options button in the top right corner. The options button on the song list allows you to control several aspects of the list display, like text size, song buttons and song fields. The options button on the document viewer lets you set alignment, columns and line wrapping. The options button on a text field allows you to set a color for the field or show a label with the field's name.
- Some layout items have a resize handle in the bottom right corner. When resizing layout items, you can generally resize them to any proportion, but to return to the default proportion, you can double-tap the bottom right corner. If you resize an item far beyond its normal proportions, it will appear with a colored background to show its clickable area.
- To move or resize a number of layout items as a group, you can drag a selection area starting from an empty area of the layout and encompassing the desired items. You can then drag or resize the selected area.
- The song list and document viewer also have Expand to Full Screen buttons that provide a shortcut for resizing to the full screen size. On iOS devices without a home button, they also have Expand to Safe Area buttons to shorten the size enough to move the resize button into the accessible area of the screen. And the document viewer has a Cover Top Toolbar option that makes it expand over the top toolbar when showing it, but that is only available if the document viewer is layered on top.
- In layouts that show the song list or document viewer on a top layer, those elements can be shown and hidden with a double-click or an app control action.
- To align, distribute or consistently size a number of layout items, you can drag a selection area, then click the selected area's options button and click the Align Centers, Space Equally or Apply Average Size buttons.
- You can add standard-sized (not resizable) text fields to the bottom toolbar by tapping one of the field slots, then selecting a field name from the list that appears. If you place any +1 or +2 items (which display info for the next song or the song after that) on the right side of the toolbar, BandHelper will move those fields to the right side of the screen. To clear one of the field slots, you can select Remove from the bottom of the list of fields. If you clear all of the slots, the bottom toolbar will be hidden and you can expand your other layout items into that area.

- You can show or hide the buttons in the top toolbar by clicking the Edit button, selecting Edit Layout: Details and scrolling down to the Top Toolbar Buttons section. These buttons provide immediate access to some functions without leaving the set list view, but take up space in the toolbar that you can reclaim by turning them off if you aren't using them.
- You can create a new layout from scratch by clicking the + button at the top of the Repertoire > Layouts list, or create a new layout based on an existing layout by selecting a layout, clicking Edit Details and clicking the Copy button.
- If you copy a layout that was created with a different screen size, the copy function will prompt you to choose between scaling the layout to the current screen size, or keeping the original size. You will probably have to make some sizing adjustments to the new layout in either case.
Most of the items you can add to a layout are self-explanatory, but a few have special capabilities:
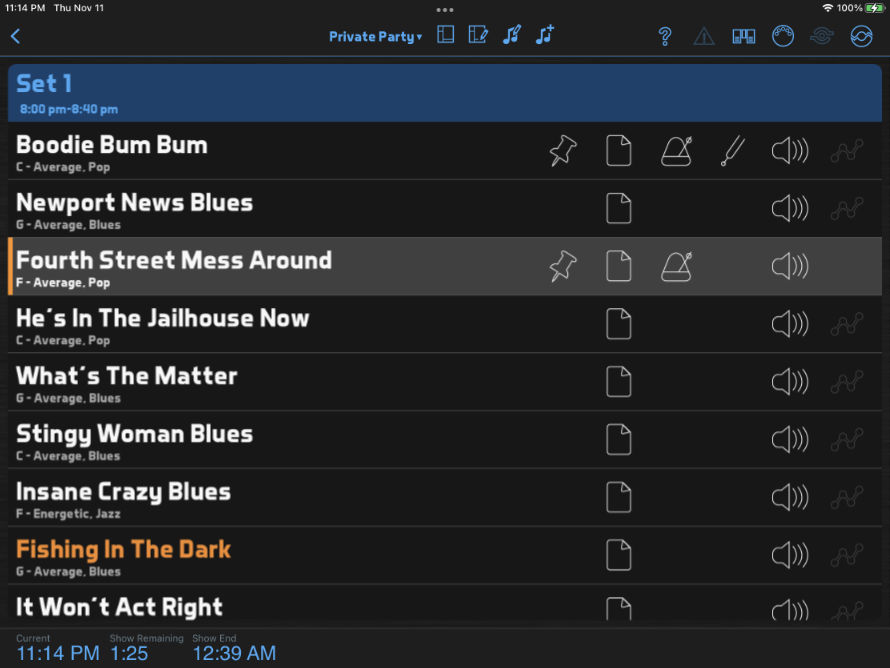
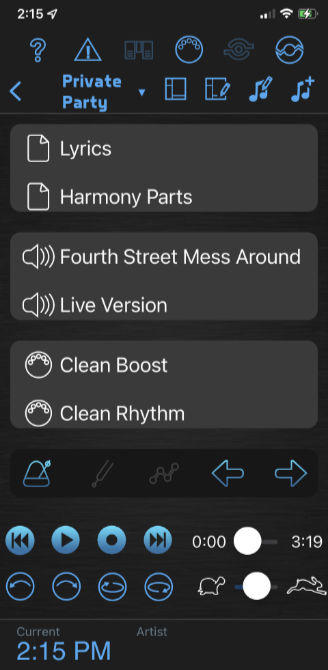
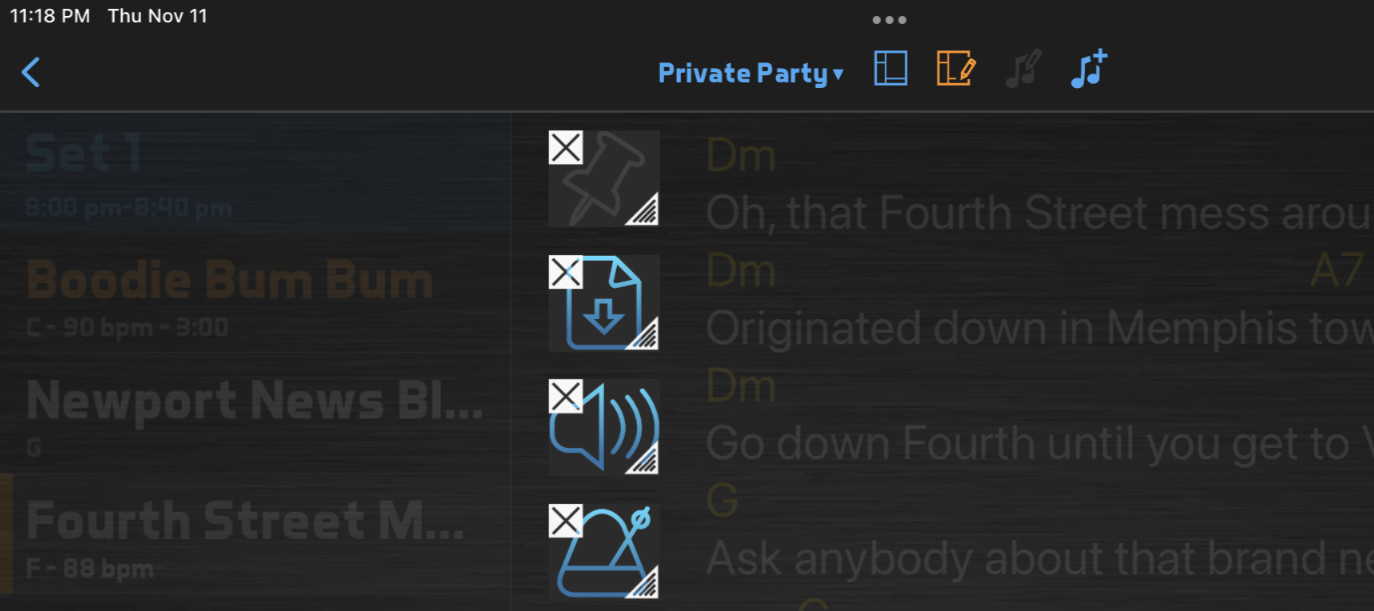
- The Song List will display the songs in the set list as a scrollable list. You cannot place other items on top the song list, but you can place other items under it in layouts where the song list is layered on top. In that case, you will only show the song list temporarily to choose the next song, and it will hide when you select a song. The options button on the song list leads to several options for controlling the display of the song list, such as text size, song buttons and song fields.
- When the song list is layered on top, you can show or hide it by double-clicking, or you can add the Song List Button to your layout and click that instead.
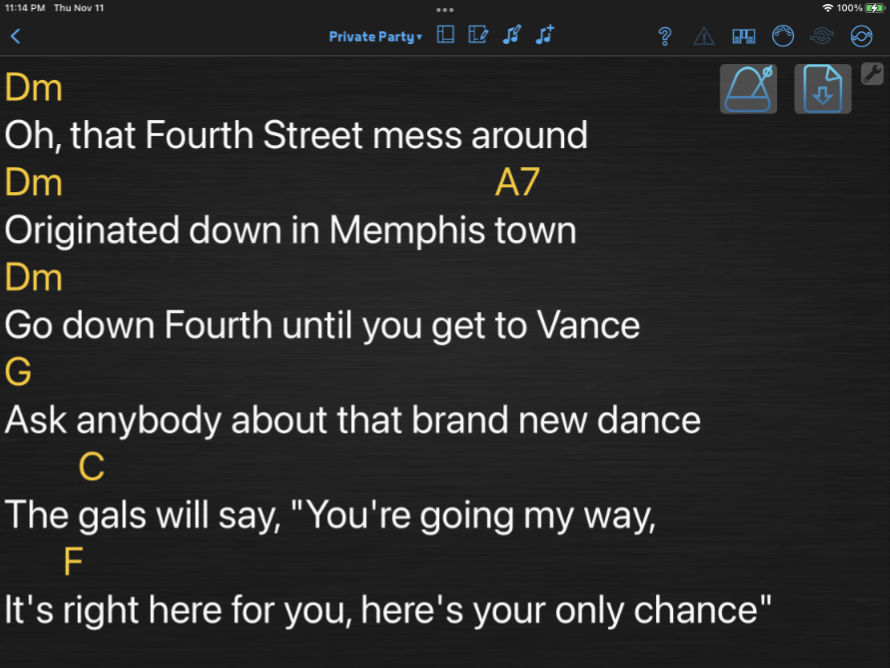
- The Document Viewer will display a song's attached documents, chords and lyrics or video. You can place other items on top of the document viewer, unless you are using a layout where it is layered on top. When you place items on top the document viewer, those items will be displayed with a semi-opaque background for better contrast against the document content. From its options button, you can set the document viewer to display in one or two columns, and the Presentation setting on individual documents and song lyrics can override this on a song-by-song basis. The document viewer will have rounded corners if it is placed away from the screen edges, for a softer look, or straight corners if it is placed against any of the screen edges, for the maximum viewing area.
- The Notes field places resizable and scrollable text onto your layout. You can pinch in or out to resize the notes text, and open its toolbar for buttons that save or reset the text size.
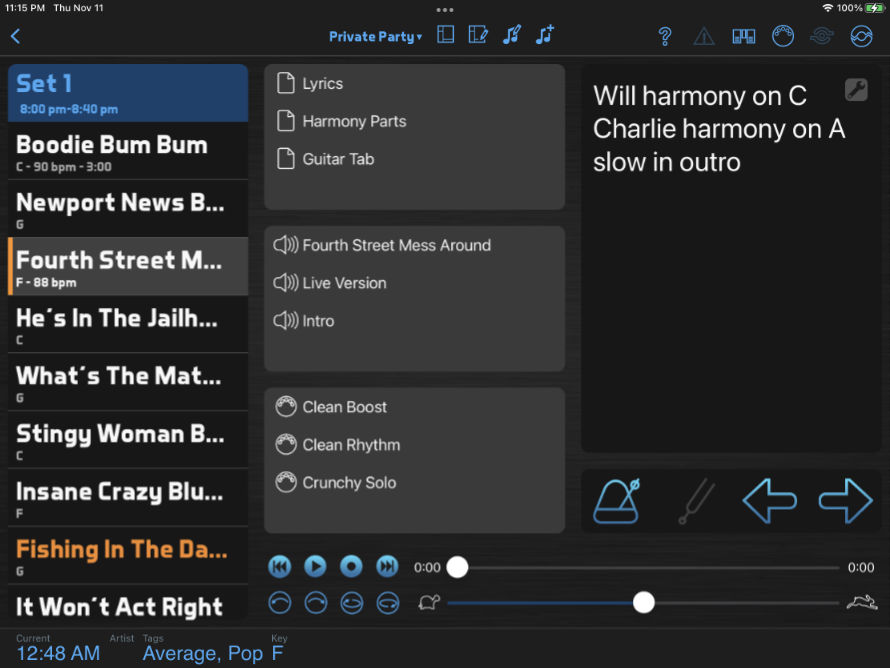
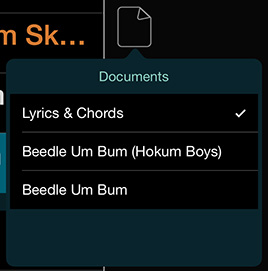
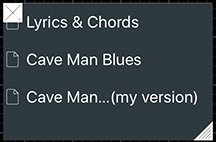
- The Document Button, Recording Button and MIDI Button will access the default document, recording or MIDI preset for a song when you click it, but you can also click and hold it to show a menu providing access to all the attached or pinned documents, recordings or MIDI presets.
- The Multiple Document Buttons, Multiple Recording Buttons and Multiple MIDI Buttons will show a separate button for each document, recording or MIDI preset attached to a song or pinned to all songs. You can resize these items to lay out the buttons horizontally or vertically. If a song has more buttons than fit into the size you designated, the list of buttons will be scrollable. The Multiple MIDI Buttons also has an option to show either attached MIDI presets, pinned MIDI presets or both.
- The Page Buttons will display a button for each page of the current document or lyrics. You can resize this item to lay out the buttons horizontally or vertically.
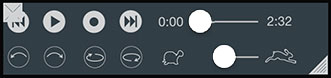
- The Automation Controls include buttons for managing your automation track, plus a location slider you can use to jump to different locations in the automation track while playing or recording. Behind the slider, the waveforms for recordings, tick marks for tempo downbeats and colored circles for other events are displayed to help navigate through the automation track.

- The Recording Controls include a top row with play/pause buttons, next/previous buttons, a progress slider and a timer, and a bottom row with loop buttons and a speed control slider. If you only need the top row, you can resize this item to hide the bottom row.
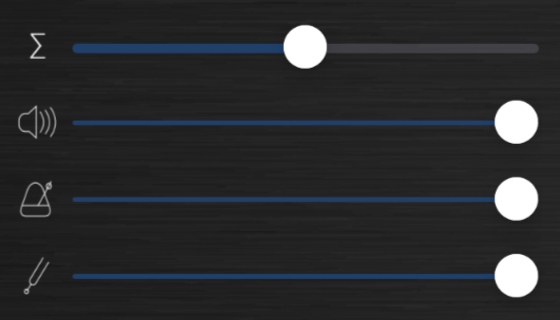
- The Master Volume includes a slider to control the output volume of all BandHelper's audio. If you enlarge this layout item, or scroll within it, you will see additional sliders to control the separate volumes for recordings, videos, tempos and starting pitches. You can orient the sliders horizontally or vertically depending on how you size this layout item.
- The Tuner Button shows a chromatic tuner. Using the tuner requires microphone permission on your device. If you open the tuner while BandHelper is playing other audio, that audio might be interrupted.

- The Box and Line items allow you to add simple design elements to organize your layout. Boxes always appear as a background behind other items, and lines can be either horizontal or vertical depending on how you size them. The options button for boxes lets you choose a box color. The options for text fields, multiple buttons and the document viewer includes a Fit to Background Box button, which neatly sizes and positions the item to fit inside of a background box you have placed under it.
Here are some features of layouts that people commonly look for, and how to find them:
- See a bigger document: Of the layout templates above, Full-Screen Lyrics and Big Fields show the document viewer full-screen, and Overlapping Buttons shows it nearly full-screen. Try adding a layout with one of those templates.
- Resize the set list text: You can click the Edit button in the top toolbar, select Edit Layout: Song List, then click the options button in the top right corner of the song list, to adjust the text sizes within the song list.
- Resize the lyrics text: You can pinch-zoom to resize your lyrics text, then open the document toolbar and click the Save Text Size button (aA icon). When you view lyrics, your saved text will be scaled to the width of the document viewer, so switching to a layout with a larger document viewer will show your lyrics larger, and switching to a layout with a smaller document viewer will show your lyrics smaller.
- Access multiple MIDI presets: The Expanded Buttons layout contains separate MIDI buttons for each MIDI preset attached to the current song or the current layout. You can also add the Multiple MIDI Buttons item to any layout, or enable it within the song list options.
- Add buttons for tempo, automation tracks, transposing, etc: You can click the Edit button in the top toolbar, select Edit Layout: Buttons and Fields, and click an empty area of the layout to add a button to access these functions.
- Remove unwanted buttons: If there are any buttons in your layout that you don't use, you can reclaim the space by clicking the Edit button in the top toolbar, selecting Edit Layout: Buttons and Fields, and clicking the X button for an item.
- Undo an unwanted change to a layout: If you're editing a layout and make a mistake, you can go to Settings > Account Sync > History, select the edit you want to undo and click Continue. Alternatively, if you're editing a layout based closely on a template, you can go to Repertoire > Layouts > [layout name] > Edit Details and click the Delete button, then add a new layout with the same template to start again.
You can share layouts across devices to reduce the need to set up and maintain too many layouts for your band, but you might have to adjust some settings to make them visible on different devices:
- You cannot view a landscape layout in portrait orientation (or vice versa), or a tablet layout on a phone (or vice versa).
- By default, new layouts are set to Scalable, so they will appear on all devices of the same type (phone or tablet) and orientation (portrait or landscape). If you want a layout to only appear on devices with the same screen size, you can turn off Repertoire > Layouts > [layout name] > Scalable. Creating separate layouts for each exact screen size lets you more precisely control the visual display, but requires maintaining a larger set of layouts.
- If you have a non-scalable layout and want to create a version of it for a different screen size, you can go to Repertoire > Layouts > [layout name] > Edit Details on the target device and click Copy for This Device. This will make a new copy of the layout sized for this device's screen. You can then click the other edit options, like Edit Buttons and Fields, to resize or move the layout items to fill the new screen size.
- If a bandmate has a different screen size and is using a non-scalable layout, you can edit it for them if you go to the Repertoire > Layouts list and scroll down to the Other Devices section. This is useful if a bandmate needs help with a customization and you don't have physical access to their device.
- By default, a new layout is assigned only to the user who created it. If you want your layout to appear for other users, you can go to Repertoire > Layouts > [layout name] > Edit Details and change the Users field.
- If you want to share layouts with users in other accounts, you can go to Repertoire > Layouts > [layout name] > Edit Details and click the Export button. The recipient can then import the file by going to Repertoire > Layouts and clicking the import button.
Before layouts were scalable across screen sizes, BandHelper used to create a set of layouts for each new device used in your account. This led to a large number of unused layouts in some accounts, which can make it difficult to find your preferred layout. You can follow these steps to clean up unused layouts and simplify your layout selection:
- First, you can identify one or more layouts you'd prefer yourself and your bandmates to use. This could be a layout you customized for your band, or just a layout based on a standard template that does what you need. If you're already viewing it in the app, you can click the Edit button in the top toolbar, select Edit Layout: Details and turn on the Favorite setting. Or you can go to the Repertoire > Layouts list in the app or the website and click the star icon.
- To let other users access that same layout, you can go to its Edit Details page and make sure all users are selected and the Scalable setting is on. Now your bandmates will see that layout on their devices, with a star next to its name.
- Remember that layouts can only scale to the same device type (tablet or phone) and orientation (landscape or portrait), so you should repeat the previous steps for each device type and orientation you expect to use.
- After designating some favorites, you can go to the Repertoire > Layouts list of the website and look for redundant layouts. You can potentially delete layouts with the same name, device type and orientation as one of your favorites. You can also use the Includes Only the User filter to identify layouts that were only used by users who you have deactivated. You can hover over the value in the Size column to see more info about when and on what device a layout was created.
- Before deleting a layout, it's best to consider whether it's a customized layout that someone is using. You can look at the Users column to see who has access to that layout and check with them if you think they might still need it. If someone did customize a layout, you can ask them to rename it and/or assign it only to themselves to help tell it apart from the standard layouts.
- To delete multiple layouts from the Repertoire > Layouts list, you can select the checkboxes next to the layout names and then click the Batch Delete button. You can select multiple checkboxes quickly by clicking one, then holding the shift key and clicking another; then all the checkboxes in between those two will be selected.
- If you delete a layout that someone was using, they will be prompted to select a different layout the next time they view a set list or smart list. You can tell your bandmates the name of the layout you recommend they use, or ask them to select one of the starred layouts.
- If you narrow down your list of layouts to just one or two for each device type and orientation, you can turn off all the Favorite settings to streamline the display of the layout options.
Tutorials