
Navigation shortcuts in the Mobile Apps
The mobile apps use a standard "tree" organization structure with a series of menus in the left column that you can click through to reach different pages. However, this can make key info feel buried deep in the menus, especially to band members who are less familiar with the overall app structure. So the apps offer a few shortcuts to access upcoming info quickly and simplify the navigation for less experienced users.
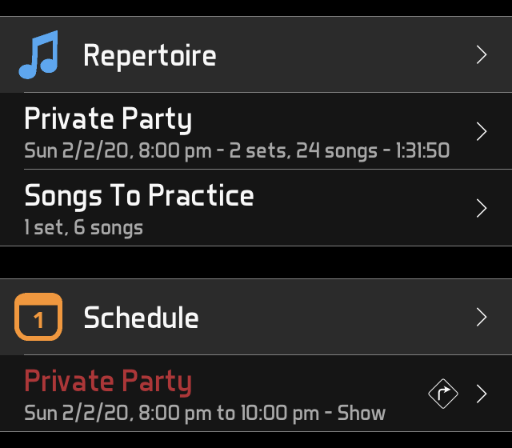
The main menu of the mobile app shows includes a button for each module in your account, like Repertoire, Schedule or Contacts. (If you have a Basic account, the app might open to the Repertoire module automatically.) You can use these to access the full information in each module. But you can place shortcuts to common items under each of these module buttons, then jump directly to those items, bypassing the regular menu navigation:
- Some modules automatically show shortcuts to upcoming or overdue items:
Repertoire: shows the set list for the next events.
Schedule: shows the next events, with a navigation buttons to launch your maps app.
Contacts: shows the next scheduled or overdue actions, with buttons to call, email or navigate to the contact.
Checklists: shows the next due or overdue items.
Finance: shows a button to add a new transaction.
Practice log: shows a button to add a new practice session.
You can control how many items appear in each of these sections by adjusting the Main Menu Shortcuts settings on the Settings > Appearance page.
- Other modules allow you to manually add shortcuts by marking items as a Favorite:
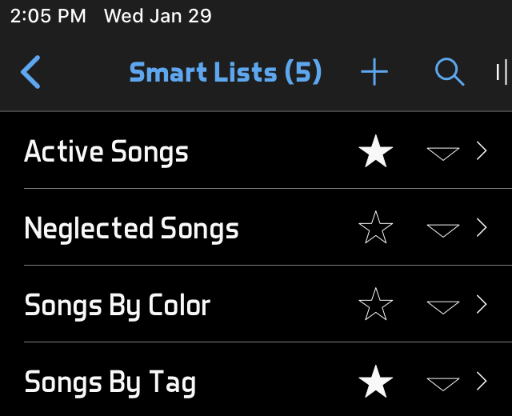
Repertoire: navigate to the Set Lists or Smart Lists list and click the star icons to select favorites.
Checklists: navigate to the Checklists list and click the star icons to select favorites.
Stage Plots: navigate to the Stage Plots list and click the star icons to select favorites.
Files: navigate to the Files list and click the star icons to select favorites.
You can control how many items appear by marking or unmarking items as favorites.
- Clicking the shortcut for a set list or a smart list will go directly to the set list view. To edit or share a set list or smart list, you will have to navigate to it through the Repertoire menu.
- For modules that show both automatic and manual shortcuts, the automatic shortcuts will appear first.
- Favorites are shared by all users in your project, so by marking favorites, you can make items easy to find for your bandmates. However, shortcuts will not appear to bandmates who are not assigned to those items. For example, an upcoming event will only appear as a shortcut to users included in that event, and a favorite set list will only appear to users assigned to that set list. This means you can make "personal favorites" by marking an item as a favorite but assigning it only to yourself.
- The Settings > Appearance > Main Menu Shortcuts settings are device-specific, so you might need to help your bandmates adjust those if they don't see the shortcuts you're creating.
The set list view is the part of the app you'll use while performing, and you should generally stay there during a performance. However, sometimes you need to switch between different set lists or smart lists during a performance. In that case, rather than backing out of the set list view to navigate to a different set list or smart list, you can set up title shortcuts, which appear when you click the title in the top toolbar of the set list view:
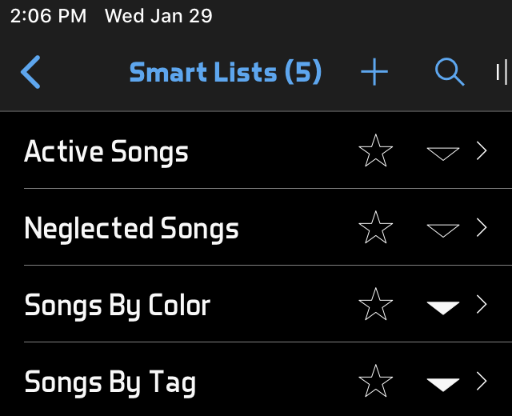
- Navigate to Repertoire > Set Lists or Repertoire > Smart Lists and click the triangle icons to create title shortcuts.
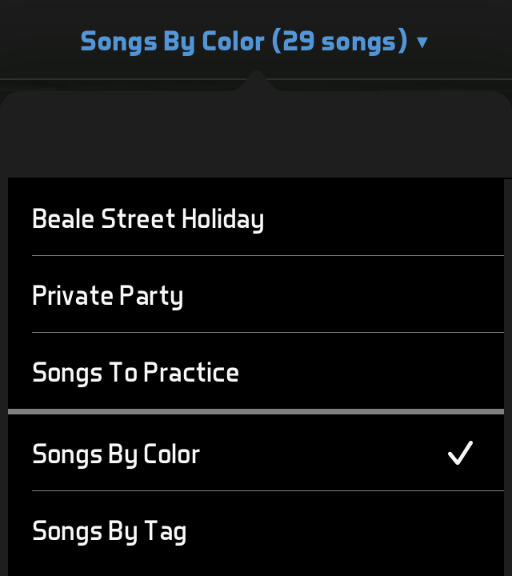
- View a set list or smart list, then click the title in the top toolbar to see a list of the shortcuts you've created. You can click one to jump directly to it without leaving the set list view.
- Unlike the main menu shortcuts, the title shortcuts don't automatically include the set list for the next events. However, the title shortcuts will automatically include the set list or smart list you first entered the set list view from, if it's not already there. This means you can start with a specific set list you created for an event, then jump to other set lists or smart lists, and jump back to the set list you started from, without having to add each event's set list to the title shortcuts.
- If you are playing recordings or tempos in the set list view, you can optionally keep that audio playing while you change between set lists or smart lists, by turning on Settings > Audio & MIDI > Continue Audio When Changing Songs.
- If other devices are following yours through live sharing, they can turn on Settings > Live Sharing > Follow Set List Selections. Then when you select a different set list or smart list from the title shortcuts, the following devices will switch with you.
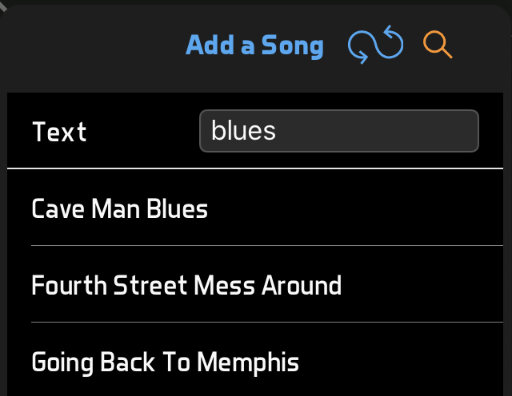
Some performers work mainly from a pre-planned set list, but occasionally need to access a song that's not on the list. This could happen when taking a request or just when a different style is needed to match the mood of the show. Rather than switching to a different set list or to a smart list, you can use the Search button in the top toolbar of the set list view to jump to any song, whether or not it's in your current set list:
- View a set list or smart list, then click the Search button in the top toolbar
 . If it's not there, you can go to Repertoire > Layouts > Edit Details > Top Toolbar Buttons and turn on Search.
 - The Search button shows an alphabetized list of all your active songs. You can use the first-letter shortcuts to jump through the list, or click the search field and enter a search term, which will match against all the song fields.
- When you see the song you want, click it and it will be added after the currently selected song in your set list.
- If you are playing recordings or tempos in the set list view, you can optionally keep that audio playing while you add a new song, by turning on Settings > Audio & MIDI > Continue Audio When Changing Songs.
- If other devices are following yours through live sharing, they can turn on Settings > Live Sharing > Follow Set List Changes. Then when you add a new song with the Search button, it will be added on the following devices as well.
- If you want to keep a record of the songs you added, you can turn on Settings > Advanced > General > Save Songs Added From Search. Then when you leave the set list view, the songs you added will be saved to the set list in the positions you added them. Otherwise, your set list will revert to its original songs when you leave the set list view.
The set list view is also the best place to work from while rehearsing, but you will often need to edit your data during a rehearsal. In that case, there's no need to leave the set list view and navigate to the repertoire menus. Instead, you can click the Edit button in the top toolbar ![]() , then select Edit Song, Edit Set List or Edit Layout. When you save your changes, the set list view will reload to show your changes.
, then select Edit Song, Edit Set List or Edit Layout. When you save your changes, the set list view will reload to show your changes.
This isn't really a shortcut, but if users are still having trouble navigating the app, they can set Settings > Apppearance > Interface Level to Simplified. This will collapse all but the most important menu items into a "More" item, and will hide some less-used fields on the edit pages. Administrators can change this for other users from the Admin > Users page of the website.
Tutorials